Finding your way around
The editor has five parts. Once you know what each one is for, you will rarely need to look for anything.
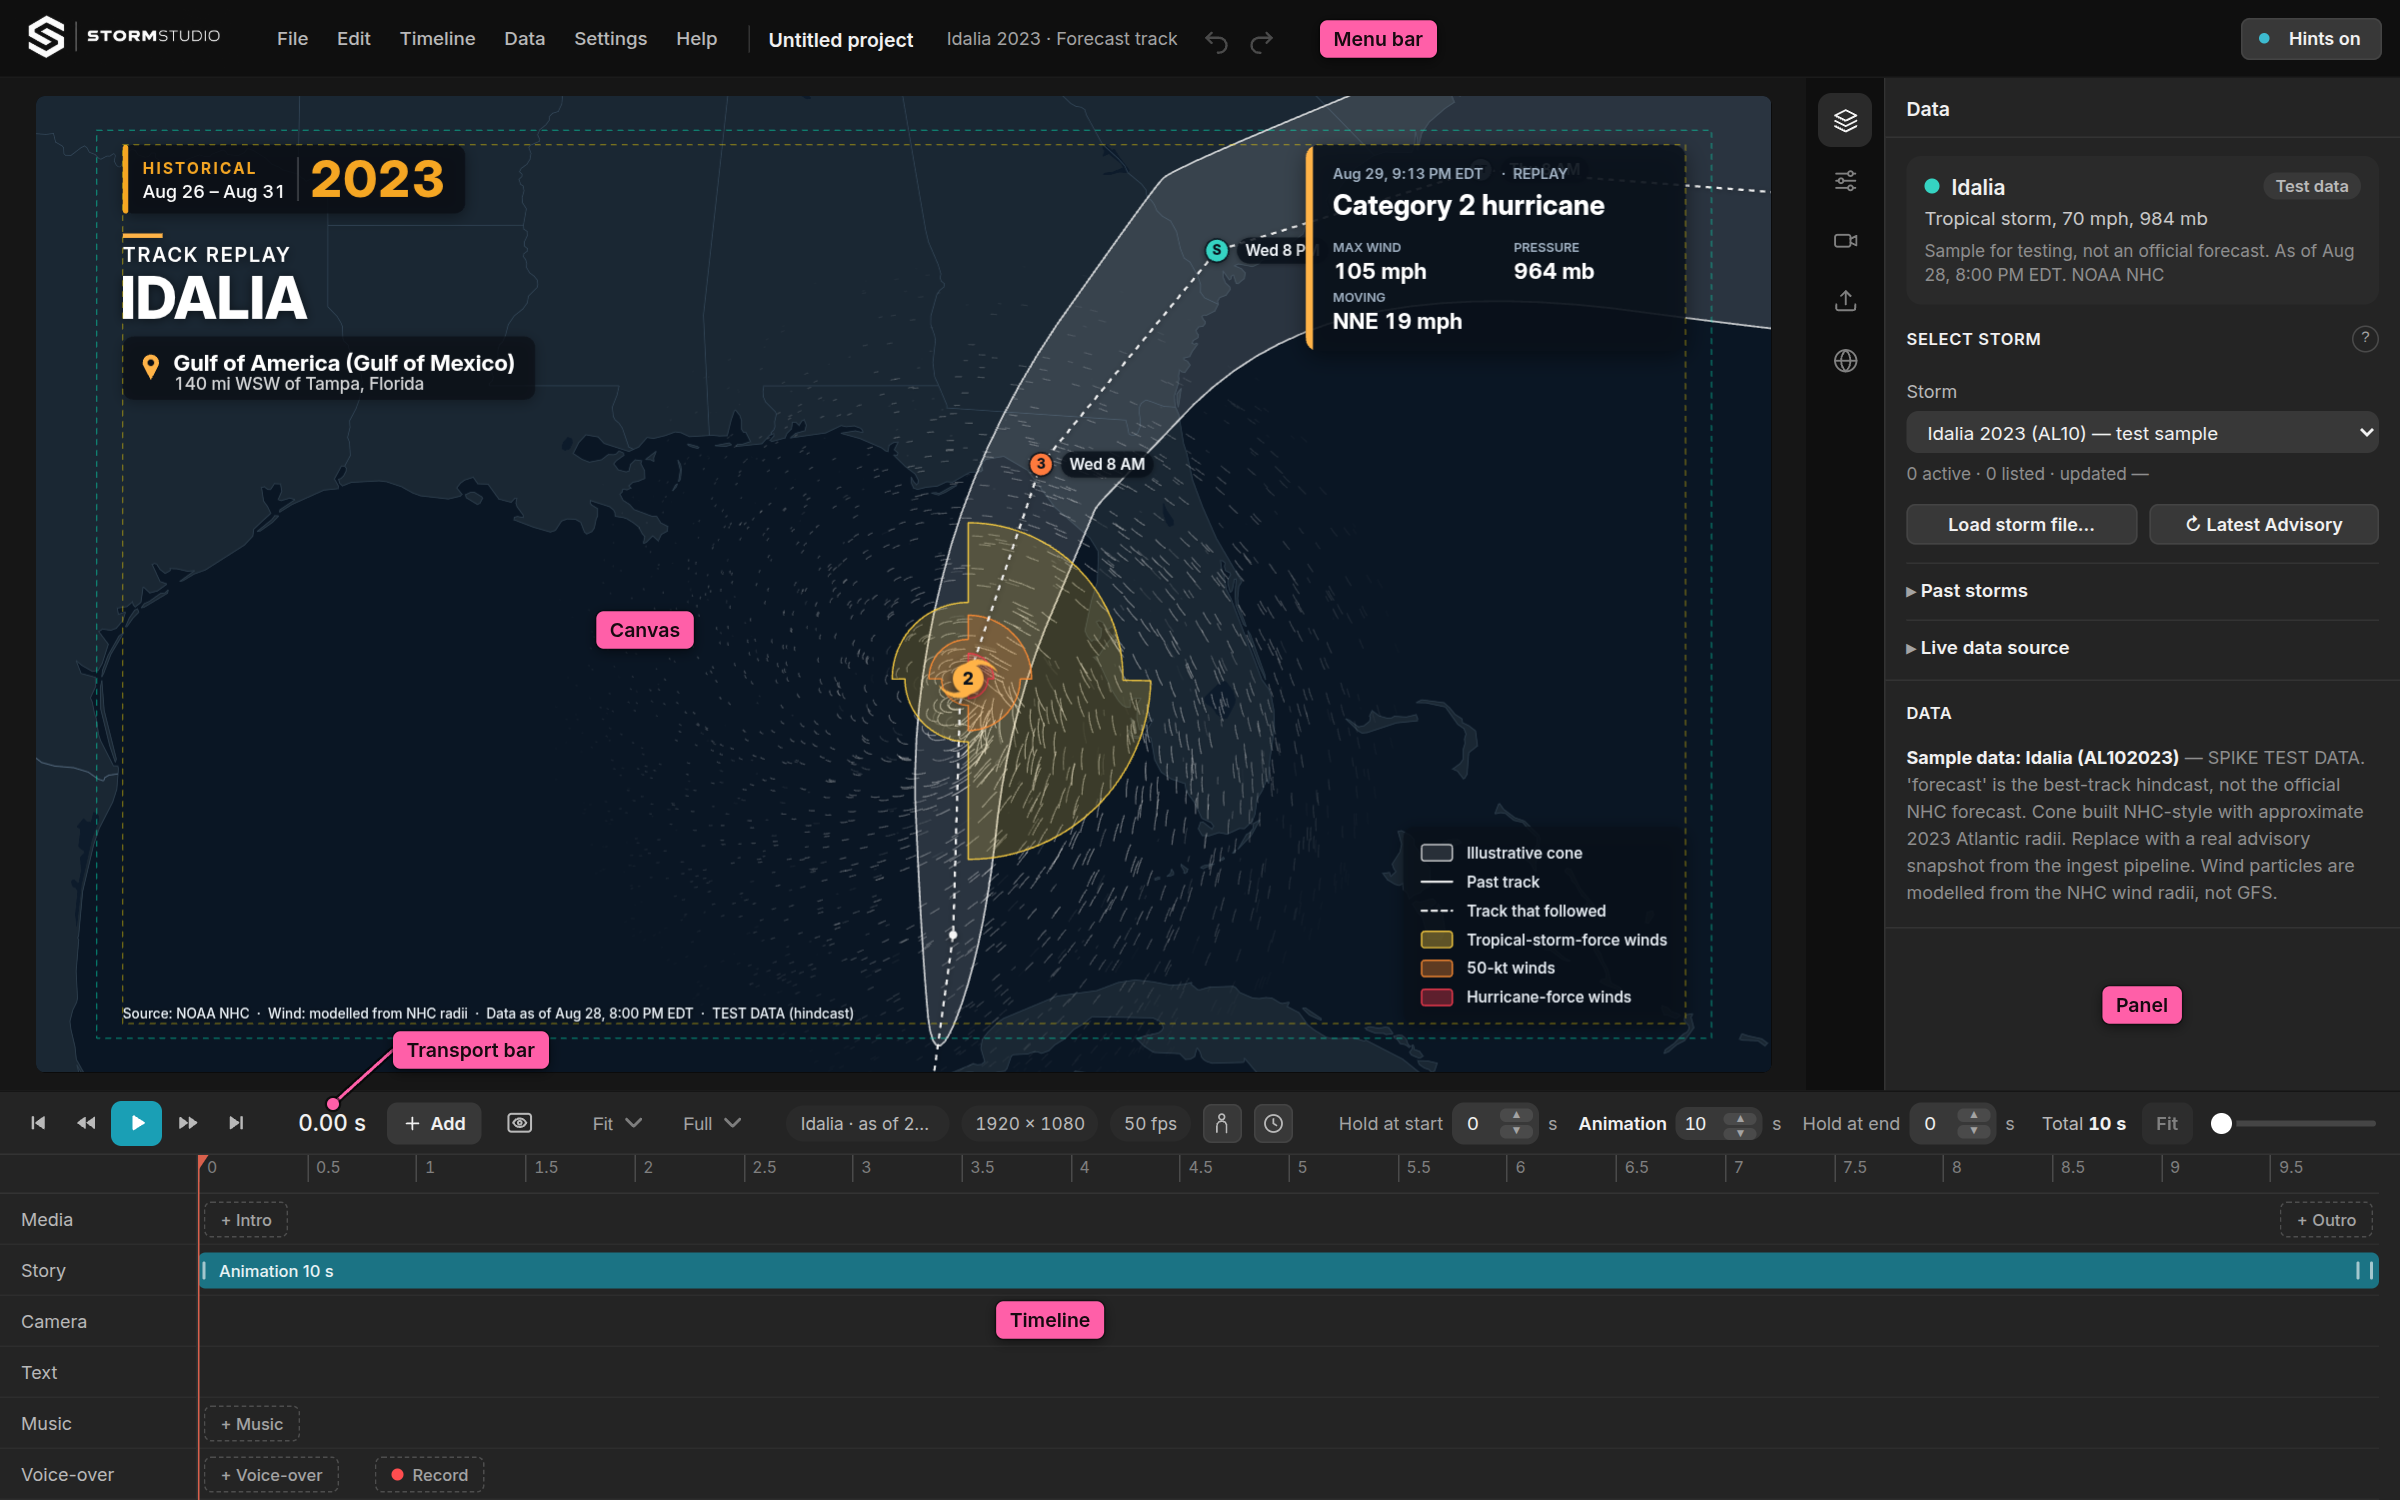
The menu bar, at the top
File · Edit · Timeline · Data · Settings · Help. Everything the app can do is somewhere in these six menus — the same things you can reach from the panels and buttons, gathered in one place for when you would rather look them up than hunt for them.
Next to the menus are your project's name, the storm it uses, and the undo and redo arrows. Undo and redo are in the Edit menu too.

- Click the Storm Studio logo to go back to the Home screen.
- Hints on the right switches the small explanations that appear as you work on and off.
The canvas, in the middle
The picture itself, exactly as it will be exported. With the safe area guides on (Settings › Safe area guides in the preview), the dashed lines show the safe areas — keep your eye inside them and so will every graphic.
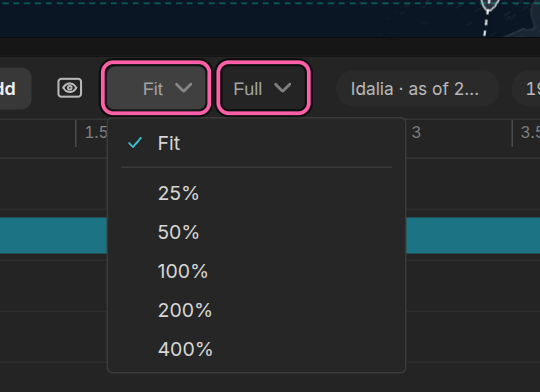
Two small menus in the transport bar, just right of the eye button, change only how the preview is shown, never the export. The first, Fit, is the canvas zoom (not the timeline's own Fit, at the far right of the bar): Fit, or 25% to 400% of the video's own pixels; a frame bigger than the view scrolls, and the middle mouse button drags it. Full is the preview's resolution: Half, Third or Quarter draw quicker, and Auto draws at Half while playing and in full when it stops.
The panel, on the right
Five icons down the right edge each open a panel beside them:
| Icon | Panel | What it is for |
|---|---|---|
| Layers | Data | Which storm and which advisory |
| Sliders | Style and brand | The look, the design of each graphic, your brand |
| Camera | Camera | How the video moves |
| Upload | Canvas and export | Frame size, file type, sound level |
| Globe | Display and units | Wind and pressure units, language, time zone |
Hover over any icon to see its name.
The transport bar, below the canvas
Play and step through the video, see where you are in it, and set how long it is: a hold at the start, the storm's animation, and a hold at the end.
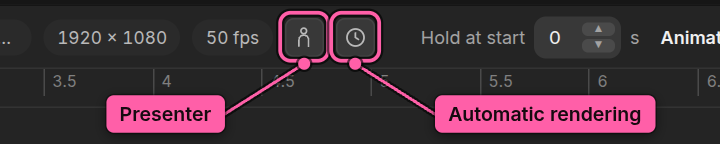
Two icon buttons sit together in the middle: the presenter button, which leaves space on one side of a widescreen picture for someone to stand, and the clock, which opens automatic rendering. The clock turns teal when a schedule is switched on, and amber while it is making a video.
The timeline, along the bottom
One row for each kind of thing in your video — Media for intro and outro pictures and clips, Story for the storm's own animation, Camera, Text, Music and Voice-over. Anything on a row can be dragged to move it, stretched from either end, or clicked to show its settings in the right-hand panel.
The + Add button, and the Timeline menu, put new things at the red playhead.
Help while you work
Every panel can explain itself. Click the small ? at the top of any section of a panel for a few sentences on what its settings do. Press F1 to open this manual, and ? on its own for every keyboard shortcut.
What next
- Save your project
- The panels in detail — every setting, one by one